A pistol “draw stroke” refers to the way in which one removes their gun from the holster and presents it. There are many different draw strokes, and there are many highly accomplished Top 25 Shooting Instructors, Top 1,000 Instructors and about 50,000 other shooters and instructors that all have a preferred “best way.” Many tactical trainers have great arguments, and I suggest that you listen to all of those arguments, test them at the range, and see what you prefer. I most frequently teach a 4-count draw stroke. I invite you to try it and see how it works for you. I also invite you to try other draw strokes, it is probable that the perfect one for you is a combination of several pistol draw stroke methods. Below are the 4 steps I teach, each with some pictures showing that step.
Stroke #1
I grip my pistol with he same grip I intend to use when shooting. My support hand starts moving for my chest/stomach area.
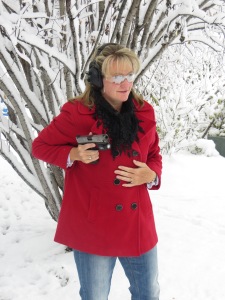
Stroke #2
I remove the pistol from the holster, placing my support hand on my sternum. I draw straight up and as soon as I have cleared the holster I begin tilting the muzzle toward my target. I stop with the inside of my wrist touching my chest at nipple level. If the pistol has a manual safety, I move it to the fire position. The pistol is now aiming at my target, and if necessary and the target is close enough, I could “point shoot” from this position.
Stroke #3
I move the pistol to by sternum area, and my support hand also grips the gun. My wrists remain locked against my chest and my arms tight against my side, making it easier for me to retain the gun if someone grabbed it and tried to pull it away. The pistol remains aimed at the target and is ready for point shooting, with a slight peripheral view bonus.


Stroke #4
I extend the pistol forward, keeping the muzzle’s plane on line with the target. At about half-extension, I change my eye’s focus from the target to the front sight of my pistol. I extend fully with my shoulders rolled forward.


As you notice from the above pictures of the draw stroke, each person does each step slightly differently. This is a good thing, we are each unique in our body style, strength, grace and preferences.
Using a car holster will of course be different.
